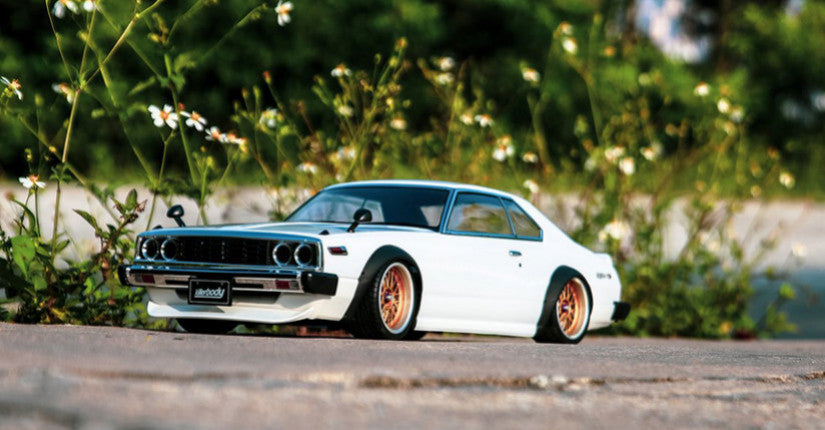
An injection-molded body is most often referred to as a "Hard Body" or ABS. This type of body differs from Lexan bodies in its opacity and offers finer details and more complex shapes. However, painting an ABS body requires more time and care than painting a polycarbonate body. It needs to be prepared and the paint must be applied gently. We'll show you how to transform your car's ABS body into a work of art!
Step 1: Blacken the interior
To give the car a realistic look, the first thing to do is apply a semi-gloss black tothe interior of the body. This step does not require any special preparation of the bodywork, and one coat may be sufficient. The finish does not need to be perfect. However, take care to avoid spilling over onto the outside of the bodywork as much as possible.
Step 2: Prepare the bodywork
If the surface of the bodywork is not perfectly smooth, the paint may mark any uneven areas. You must therefore prepare the body by sanding offany excess plastic with a small fine file. Remove any drips, superfluous lines, and small irregularities. Remember to sand gently and check your work frequently so as not to remove too much material. If this is the case, use body filler to fill the hole and then sand again.
Step 3: Apply a coat of primer
If you have blackened the inside of the body, be sure to mask it to prevent excess primer from reaching this black surface. Apply the primer in thick layers to cover the body evenly. You don't need to achieve a perfect finish; the main thing is to cover the entire surface.
Step 4: Prepare to apply the color
This step is optional, but if you want a vibrant paint job, it's a must. Allow the primer to dry completely for a few days, then gently sand the entire body with 1000-grit sandpaper. This smooths the surface and gives the paint a rough texture to which the color will adhere better. If you go through the first coat of paint when sanding, apply a new coat of primer and sand the surface again. When you have finished sanding the body, wash it again with soap and water and make sure the body is completely dry before applying the paint.
Step 5 Step: Spray the paint
Unlike primer, color coats must be applied with care. For the first coat,simply spray the paint onto the bodywork (do not try to cover it completely).
You should end up with a thin layer of paint with the primer showing through. The goal here is to prepare the surface so that the second coat will adhere.
Let the paint dry for about 15 minutes, then apply another coat. Repeat the process a third time. Apply enough paint to achieve a smooth surface and do not touch the paint while it is drying. Ideally, place the bodywork in a dust-free, warm, dry place and leave it to dry for as long as possible car. The paint may sometimes appear dry, but in fact it is not.
Step 6: Polish the paint
Once the paint is completely dry and you are satisfied with the result, you can skip this step by applying a coat of polish directly to the bodywork to give it shine and gloss.
If you want to give the car a mirror-like shine, you can also polish the paint to remove the orange peel texture caused by paint spraying. To do this, if you have a lot of "flakes," start with 4000-grit sandpaper, or if you don't have any, you can go straight to polishing with 6000-grit sandpaper. Rub until you obtain a uniform matte finish. Finish with 8000-grit sandpaper.
Be careful around corners and raised areas because the paint is thinner there and can be easily removed. When you have finished sanding, apply a polishing product.
Step 7: Add details
Before painting details, wash the area with dishwashing liquid to remove the polishing product used to make the bodywork shine. This will help the paint adhere better and prevent it from chipping.
If you are adding stripes or other designs to the bodywork, check your masking carefully to ensure that the adhesive tape is securely in place so that the paint does not bleed underneath and no areas are exposed. When spraying the color, apply light coats. Coats that are too thick may cause the bodywork to bulge, which does not look clean. Once the paint is dry, you can remove the masks.